A volumetric scene authoring tool for the Voxel VX2 — load 3D models, animate them, and present them as slideshows on a true volumetric display.
VoxelStudio is built around a simple workflow:
The whole project saves to a single .vxproj file (JSON under the hood) so you can email it, version-control it, or share between machines.
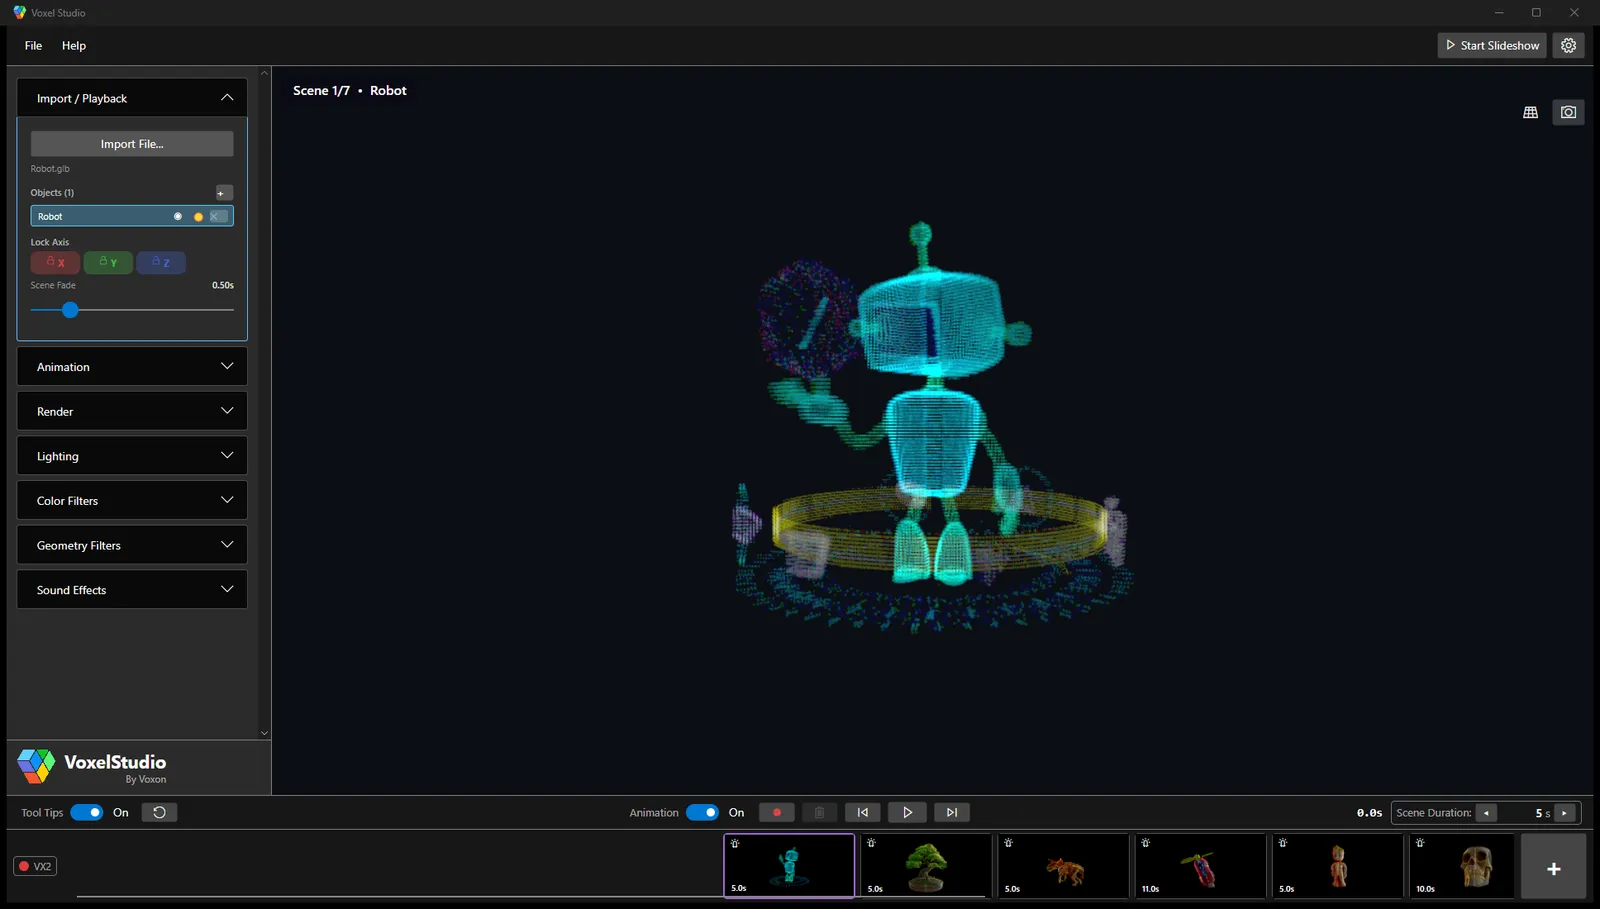
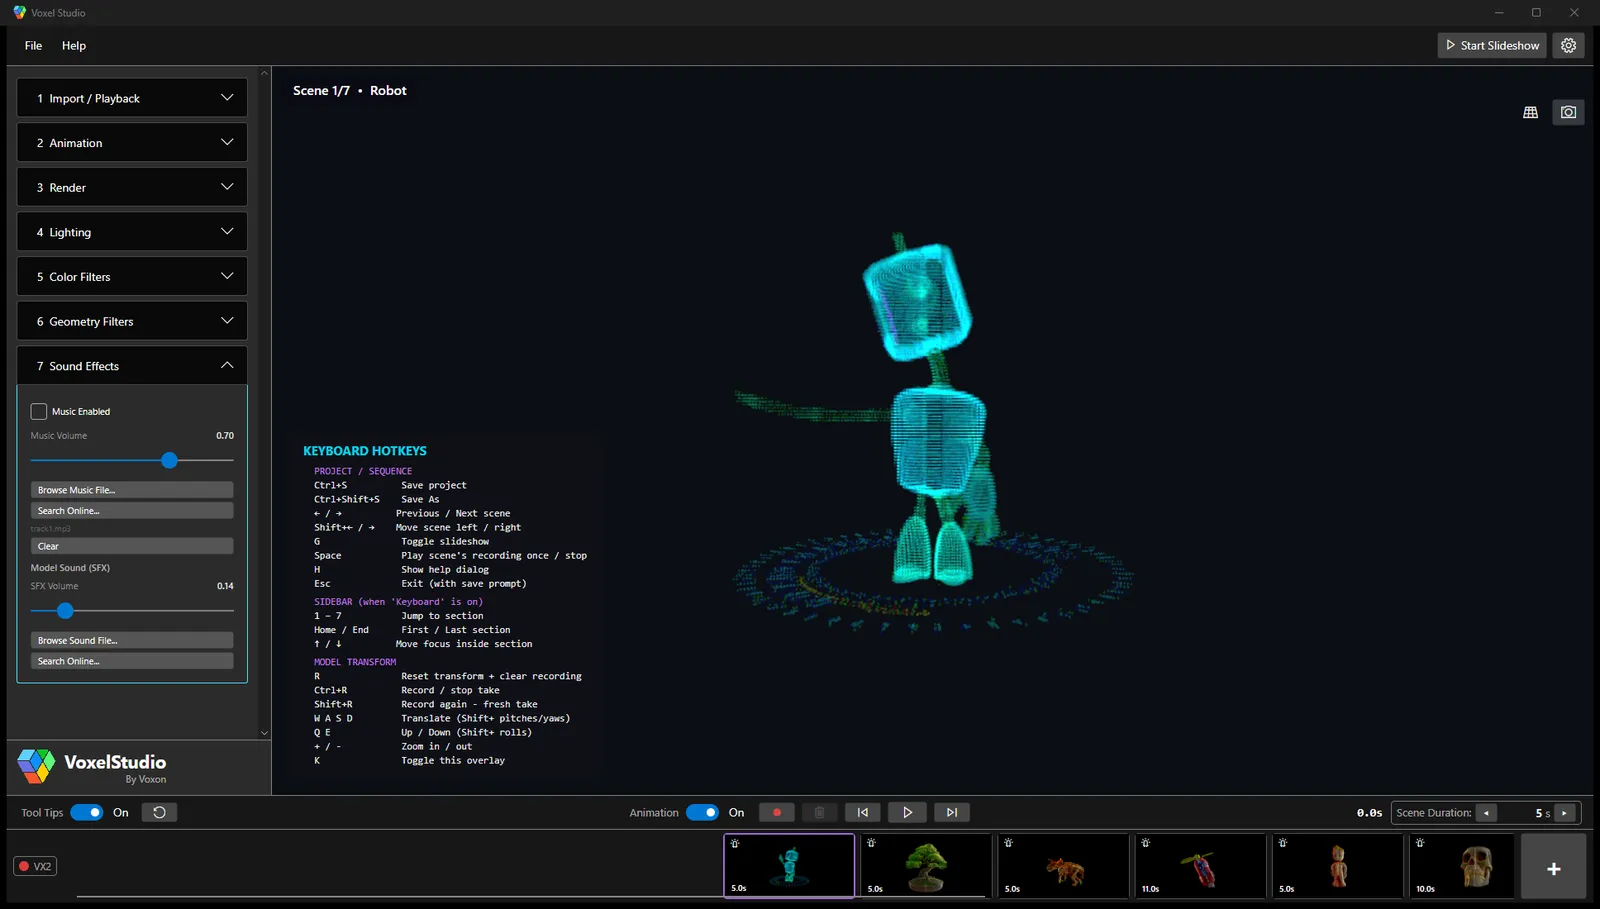
The window is divided into four regions.
Project actions on the left — Save Project and Load Project. Project name and the active section name in the centre. Start Slideshow, Keyboard, and Settings (gear) on the right.

Seven collapsible sections — Import / Playback, Animation, Render, Lighting, Color Filters, Geometry Filters, Sound Effects. Each has a coloured left stripe so you can find it quickly. Only one section is open at a time; opening one closes the others. If you switch scenes with a section open, the same section stays open after the switch.
Live render of whichever scene is loaded. Overlays floating on top:
Help button on the far left, a horizontal strip of scene thumbnails in the middle, and an add-scene + button on the far right. The active scene's thumbnail has a coloured outline. Click a thumbnail to switch + preview-loop, shift-click to start the slideshow from there, right-click for move/duplicate/delete.
Supported formats: FBX, GLB / GLTF, OBJ, STL, PLY, and other AssimpNet-recognised 3D formats.

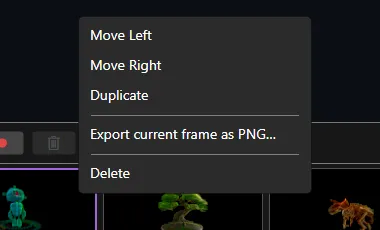
Right-click any thumbnail for the context menu:
| Action | Result |
|---|---|
| Click | Switch to that scene and preview-loop its recording (frame 0 → end → repeat). No scene advance. |
| Shift+Click | Start the slideshow from this scene onwards. |
| Right-click | Move / duplicate / delete menu. |
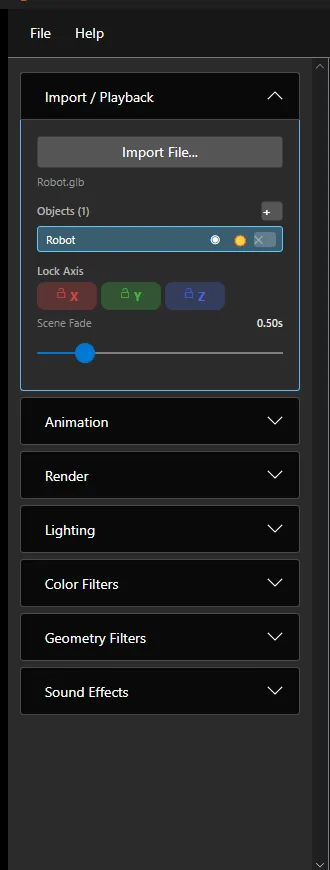
The first sidebar section — import models and set per-scene transform locks and fade here.
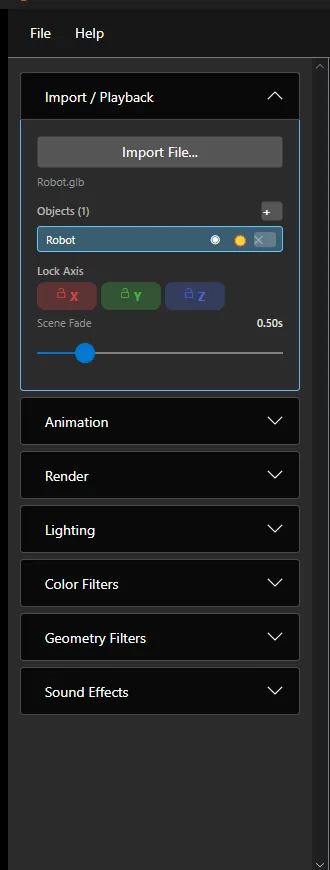
Click Import File… to load a 3D model. The loaded filename and Objects list update to reflect the model's hierarchy.
Three toggle buttons — X (red), Y (green), Z (blue) — lock each world axis so it cannot be rotated by mouse drag or keyboard. Useful when you want spin-around-Y only.
Total seconds of fade-to-black-and-back when changing scenes. Project-wide. Defaults to 0.5 s; set to 0 for instant cuts.
The Record (●), Clear (🗑), Animation toggle, playback transport (⏮ ▶ ⏭), current-time counter, and Scene Duration slider all live in the bottom bar beneath the scene strip — see the next section.
Each scene can carry a per-frame recording of position, rotation and scale. That recording is what plays back during the slideshow, during Preview Loop, and during Overdub passes — so anything you can do to the model with the keyboard / mouse / SpaceMouse can be captured and replayed.

The Animation toggle enables or disables animation playback for the current scene. The Record and Clear buttons control per-frame capture:
| Button | What it does |
|---|---|
| Record ● | Starts recording. Clears any existing recording first and captures frame-by-frame transforms. Press Ctrl+R as a shortcut. When you stop, the mode auto-engages overdub on what you just laid down. |
| Clear 🗑 | Throws away the recording for the current scene and resets to the default pose. |
Overdub mode engages automatically after a Record take ends — any movement you make during playback replaces that timestamp on the next pass (the looper-pedal feel). The playhead turns orange during overdub.
While any recording or playback mode is active, a thin coloured bar appears at the bottom of the viewport with a "Frame N / Total" badge above it. Colour tells you which mode is driving:
Total frames = Scene Duration × 60. The bar advances at the same rate regardless of mode, so the beat you record on Scene 1 stays in lock-step when Scene 2 plays back at a different duration.


Press R (or click Reset Transform at the top-left of the viewport) to restore transforms to their first-load pose, clear the per-scene recording, and stop any active recording mode.
Tip: A clean workflow is — load a scene, press Ctrl+R, drag/WASD the model around for the take you want, press Ctrl+R again to stop. You're now in Overdub mode with the take looping; tweak it as much as you like, then press Ctrl+S to save.
Once a scene is dialled in — model, transforms, recording, lighting, filters — you can freeze its full frame sequence to disk via File → Render to Video…. Playback then runs from the file instead of recomputing the scene every frame, which is cheaper at runtime and lets you ship a scene to someone who doesn't have your source model. Multi-scene projects offer a Current Scene / All Scenes prompt; All Scenes bakes each scene silently to baked/<scene>_baked.mkv next to the project, skipping scenes whose existing bake is still in sync.
The output file format is fixed (the in-app Baked Video Settings… dialog only exposes a playback-time Density slider). What goes into the .mkv:
FFV1 (lossless, full RGB24 — no chroma subsampling, no generation loss).MKV (Matroska).1536 × 512 — a 6-face cubemap tiled side-by-side; top half RGB colour, bottom half 16-bit depth encoded as R = high byte, G = low byte, B = 0.30 fps on VX2, 20 fps on VX2-XL (matches the volume's native VPS).FLAC, present only when the scene has a Model Sound File assigned (Sound Effects tab); global music is not embedded.Tip — mixing the baked video in Premiere or Resolve: the .mkv is a cubemap depth-map designed for the in-app playback path, not a normal-looking video. Options:
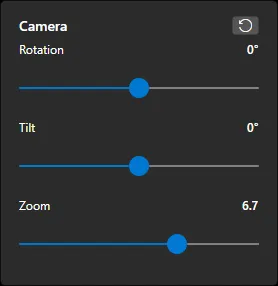
FFV1/MKV natively — drag the bake straight onto the media pool.ffmpeg -i scene_baked.mkv -c:v prores_ks -profile:v 4 -pix_fmt yuv444p10le -c:a pcm_s16le scene_baked.movThe viewport top-right has a camera-icon button. Click it to open the camera flyout: Rotation, Tilt, and Zoom sliders, plus a reset arrow that returns the camera to its default pose. While dragging any slider, the volume bounds are temporarily highlighted on attached VX2 hardware.
Hover the viewport and drag to move the model. Mouse input is suspended during Preview Loop and Slideshow so it can't fight a recorded playback.
+ / − keys).A 3-pixel drag dead-zone gates rotation, so a clean click won't nudge the orientation. Per-axis Lock flags still gate rotation; translation ignores them by design.
A 3Dconnexion six-axis puck drives the viewport when attached. All six axes — X / Y / Z translation and Yaw / Pitch / Roll — feed the currently selected control target.
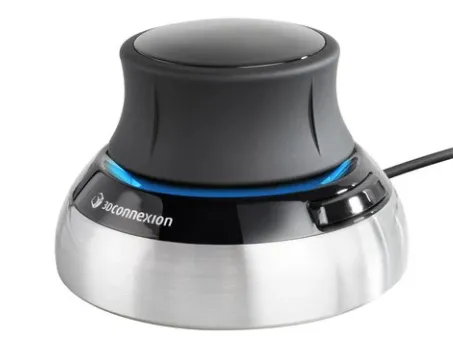
Switch target in the Lighting tab's "3D Mouse Moves" selector. Per-axis mapping and sign are configured in Settings → Input. When the Render tab's Resample mode is Smart, releasing the puck fires a final voxel redistribution so the settled pose gets a clean refresh.
With a controller plugged in: left stick rotates the model, right stick translates XY, triggers zoom (LT out, RT in), shoulder buttons (LB / RB) step previous / next scene, and Start resets the transform.
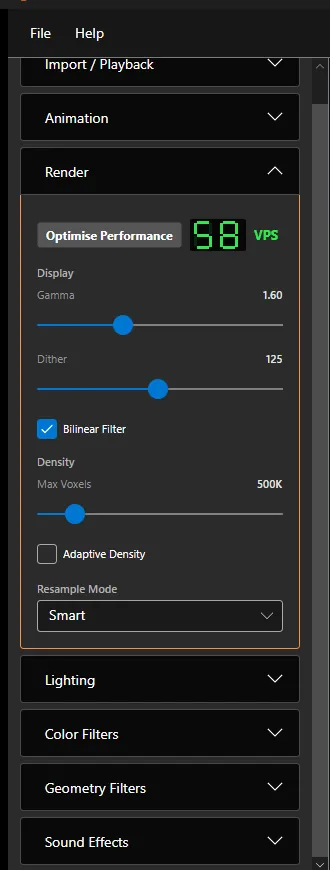
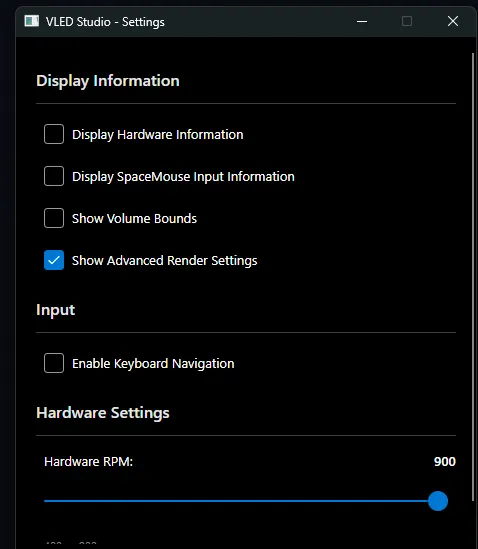
The Render tab has two presentations — Simple and Advanced. Toggle Advanced from the Settings window.
Up to several spotlights per scene, each with position, target, colour, intensity, and falloff — good for sculpted highlights on detailed models. The lighting computation runs on the GPU via DirectX 12 compute shaders for real-time evaluation.
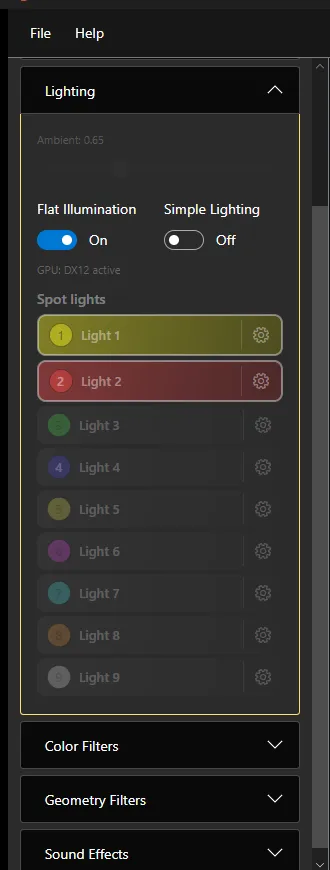
Click a light's name to open its flyout — drag in the viewport to position the light or its target. With the flyout open, the SpaceMouse drives the light or target instead of the model.
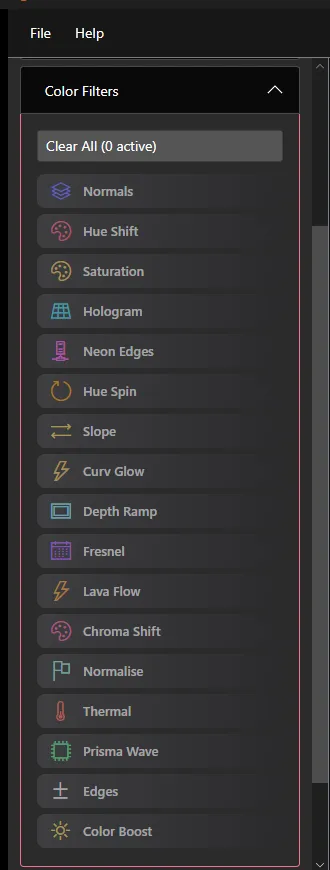
22+ post-process colour filters that re-tint the voxel cloud. Hover a tile for an instant preview; click to commit. Examples: Hue Shift, Hologram, Neon Edges, Lava Flow, Thermal, Glitch, Edges… Multiple filters can be stacked — the active list shows as small badges on the scene's thumbnail.
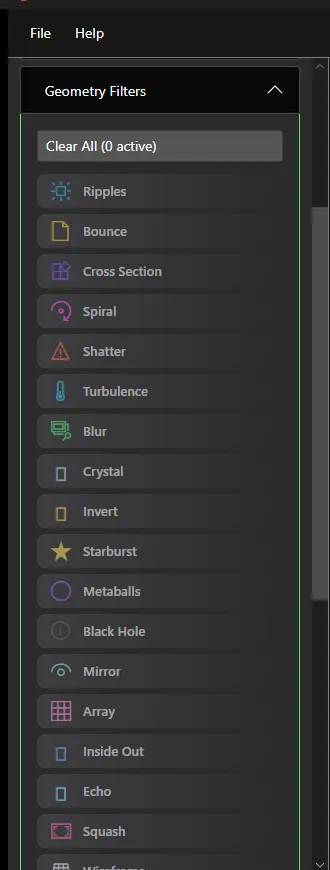
18 GPU-driven displacement/effect filters that warp the voxel cloud each frame: Ripples, Bounce, Cross Section, Spiral Warp, Shatter Pulse, Turbulence, Fractal Noise, Crystallize, Sphere Invert, Starburst, Metaballs, Event Horizon, Burn, Mirror, Array, Inside Out, Echo, Inflate.
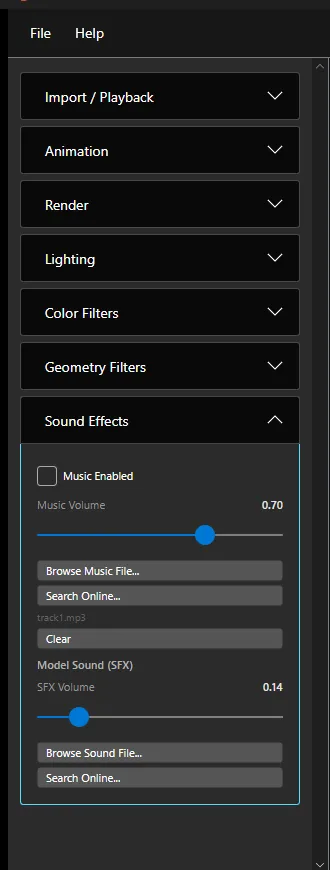
Two audio tracks per project:
NAudio handles WAV / MP3 / AIFF / FLAC. When the slideshow advances scenes, any SFX still playing on the outgoing scene is cut so it doesn't bleed into the next slide.
Single-click any thumbnail in the bottom strip to enter Preview Loop. The scene loads and its recording plays on a Scene-Duration cycle, repeating until you do something else. The viewport playhead turns green. Useful for editing one scene's animation in isolation while seeing exactly how it'll look in the slideshow.
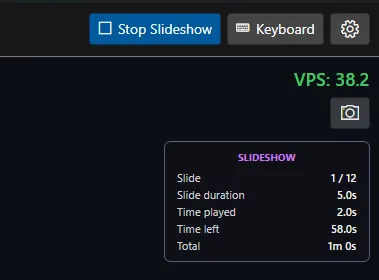
While the slideshow runs, an info overlay top-right shows your position in the sequence. Press G to toggle the slideshow on/off.
Modes are mutually exclusive. Starting the slideshow stops Preview Loop / Record / Overdub / Loop. Pressing R stops everything and clears the recording.
Click the gear icon at the top-right to open the Settings window. Project-wide options live here — the per-scene stuff is in the sidebar.
VoxelStudio projects save as a single .vxproj file (JSON) plus a sidecar thumbnails folder.
| Action | How |
|---|---|
| Quick Save | Top-bar Save Project, or Ctrl+S |
| Save As… | Ctrl+Shift+S |
| Load | Top-bar Load Project |
What's saved: the scene list and order; per-scene transforms, recordings, lighting, colour and geometry filters, sound effect, and Scene Duration; project-wide settings (Scene Fade, Hardware RPM, theme, advanced toggle, …); and the camera pose.
VoxelStudio talks to a Voxel VX2 volumetric display via the LedHost SDK. With hardware attached, the model is rendered into the volume directly using DrawVox_Batch; without hardware, the on-screen viewport simulator gives you the same scene.
A few features only have visible effect on real hardware:
Press H at any time for a live shortcuts dialog inside the app, or K for the on-screen overlay.
| Ctrl+S | Save project (silent — overwrites current file) |
| Ctrl+Shift+S | Save As… (file picker) |
| ← / → | Previous / next scene |
| Shift+← / Shift+→ | Move current scene left / right in the sequence |
| Click thumbnail | Preview-loop this scene |
| Shift+click thumbnail | Start slideshow from this scene |
| G | Toggle slideshow |
| H | Show Help dialog |
| Esc | Exit (with save prompt) |
| 1 – 7 | Jump to that sidebar section |
| Home / End | First / last sidebar section |
| ↑ / ↓ | Move focus inside section (when sidebar focused) |
| K | Toggle Keyboard mode (number badges + on-screen overlay) |
| R | Reset transforms + clear scene recording |
| Ctrl+R | Record / stop take (auto-overdubs on stop) |
| W A S D | Translate model |
| Shift + WASD | Pitch / yaw model |
| Q / E | Up / down (Shift = roll) |
| + / − | Zoom in / out |
Explore the VX2 and VX2-XL, try the live simulator, or talk to us about your use case.